Question:
How to do you install Icons?
Answer:
Download the compressed icon .ZIP file using the WinZip Tutorial. Extract the enclosed .ICL (Icon Library) to a local directory on your hard drive.
Right-click on an open area of the desktop and choose "Properties" from the popup menu.

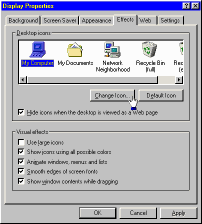
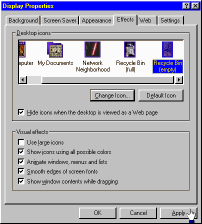
Select the "Effects" tab (Win 98) or the "Plus!" tab (Win 95). Click on the desktop icon you wish to change and then click the "Change Icon..." button.
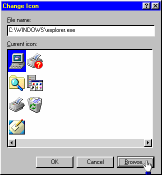
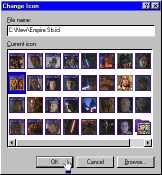
In the following window, click on the "Browse" button to locate the icon or icon library file on your system.
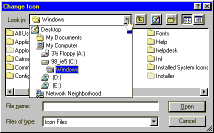
Click on the "Look in" pull-down menu and choose the directory location of the saved .ICL file.
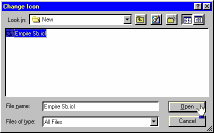
Select "All Files" In the "Files of type" pull-down menu. Highlight the .ICL file and click on the "Open" button.
Change the current icon by selecting any of the icon images from the "Current icon" list. Click the "OK" button to apply your selection.
Once you have made all the desired changes to your desktop icons by repeating these steps for each icon association, simply click the "Apply" button to relate the changes to your desktop.
Note: These instructions are for Microsoft Plus! users only. While these instructions are posted as a helpful guide, we are not responsible for any damages that may result from the use of icon files or icon software. Always scan any files for viruses and install new software at your own risk.

